Hi there, how are you? Have you ever felt that deep satisfaction of turning banana peels and coffee grounds into superfood for your plants? That’s exactly what happened to me when I discovered composting at home—and honestly, it changed the way I connect with my garden! In this 2,000-word guide, I’ll show you how to compost at home in a way that blends sustainable gardening with the warm feeling of a cozy living space. Expect practical tips, fun stories from my adventures with worms and kitchen scraps (including some hilarious mishaps), and a whole lot of inspiration. Grab a cold juice, and let’s turn your trash into treasure—and your home into a greener, more welcoming place!
Why Is Composting So Amazing?
Before we dive into the step-by-step, let me tell you why composting is one of the best things you can do for your garden. Besides reducing landfill waste, you create a natural fertilizer that makes your plants shine—from basil to succulents! When combined with cozy home gardening, composting transforms your space into a sustainable, vibrant retreat. My 2-square-meter balcony became a green oasis thanks to homemade compost. And the best part? It’s easier than you think! Ready for this green adventure?
1. Composting Basics: What You Need to Know
Composting is the process of breaking down organic waste (like fruit peels and dry leaves) into a rich, nutrient-packed soil conditioner. It may feel like magic, but it’s all science—microorganisms and worms decompose the material into something your plants will absolutely love. Here’s the basic formula:
- Green Materials (Nitrogen-rich): Fruit and vegetable scraps, coffee grounds, fresh grass.
- Brown Materials (Carbon-rich): Dry leaves, shredded cardboard, sawdust, small twigs.
- Balance: Use a 2:1 ratio of greens to browns for optimal results.
- Avoid: Meat, dairy, oils, and heavily salted or greasy cooked food—they attract pests and smell bad!
My Story: My first composting attempt was just a bucket full of orange peels—no “brown” materials at all. The result? A smell straight out of a science experiment! I quickly learned to balance the mix, and now my compost is pure gold.
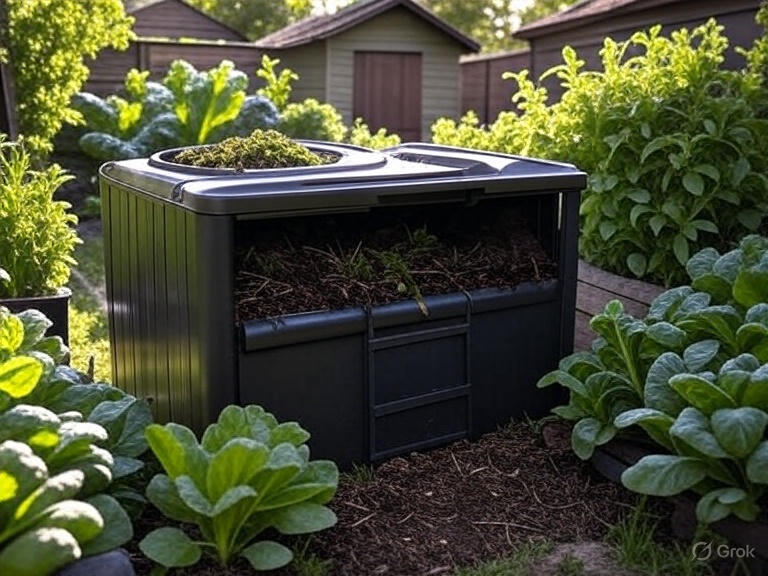
2. Choosing the Right Composting System
You don’t need a big backyard to compost—even a tiny apartment works! Here are a few small-space options:
- Bucket Compost Bin: Perfect for balconies or kitchens. I use a lidded bucket on my balcony.
- Vermicomposting: Uses red wiggler worms to speed up decomposition. My worm bin is my new obsession!
- Styrofoam Box: Affordable and great for beginners. I tested one before upgrading to a larger bin.
Pro Tip: Start small—a 10-liter bucket is more than enough. My first compost bin fits perfectly on my balcony and blends right in.
3. Materials & Tools You’ll Need
You probably already have most of this at home! Here’s what you’ll need:
Containers:
- Plastic or Metal Bucket with Lid (15–20 liters): Drill holes for airflow.
- Worm Bin: A plastic box or bucket, plus about 500g of red wigglers and some bedding (shredded newspaper).
- Styrofoam Box: A low-cost starter option that works surprisingly well.
Cost: $10–$50, depending on what you already have.
Tools:
- Drill: For aeration holes.
- Small Shovel or Scoop: To mix the compost.
- Spray Bottle: For moisture control.
Extras:
- Dry Leaves or Cardboard: Free and essential for balancing the compost.
- Kitchen Scrap Container: I use a painted yogurt container under my sink.
My Oops Moment: I started with a bucket without holes—it got wet and stinky fast! A few drilled holes made a huge difference, and now my compost can “breathe.”
4. Step-by-Step: How to Compost at Home
Let’s get our hands dirty! Here’s how to set up and maintain a compost system in a small space like your balcony.
Step 1: Set Up Your Bin
- Choose a container with a lid and drill 5–10 small (0.5 cm) holes on the sides for air.
- Add a 10 cm layer of brown materials (like dry leaves) at the bottom.
My Setup: I use a 15-liter paint bucket—works perfectly on my balcony!
Step 2: Add Your Materials
- Layer your green (scraps) and brown (paper/leaves) materials in a 2:1 ratio.
- Start with a handful of greens (like banana peels), then cover with browns (like shredded cardboard).
- For vermicomposting, add your worms after the first layer.
My Tip: I add coffee grounds and cardboard every week—it keeps the mix happy!
Step 3: Mix & Maintain
- Stir the compost weekly to aerate it—I do this every Sunday with my morning coffee.
- Keep it moist like a wrung-out sponge. A spray bottle helps prevent overwatering.
- Check the smell: good compost smells earthy. If it stinks, add more browns.
Step 4: Wait & Harvest
- Composting takes about 2–3 months (faster with worms). My first batch took 10 weeks and was totally worth it!
- When it’s dark, crumbly, and earthy-smelling, it’s ready.
- I sift mine with mesh to make fine compost for my plants.
Gardening Tip: Mix compost with soil at a 1:3 ratio—my basil absolutely thrives with it!
My Experience: I once overloaded my bin with onion peels—the smell was wild! I learned to balance it with extra cardboard, and now my compost is odor-free.
5. Using Your Compost in the Garden
Homemade compost is like premium plant food! Here are a few ways to use it:
- Mix with Soil: Use 1 part compost to 3 parts soil for potted plants. My herbs and succulents love it!
- Top Dressing: Sprinkle a thin layer around your plants. My peace lily gets a monthly treat and looks amazing.
- Compost Tea: Soak compost in water for 24 hours, strain, and use as liquid fertilizer. My tomatoes went wild!
Gardening Bonus: Add compost to a vertical herb garden with rosemary and sage. Mine smells heavenly thanks to the compost!
6. Blending Composting with Cozy Home Vibes
Composting fits beautifully into a warm, green home:
- Balcony: Hide your bin behind a palm or in a decorative box. Mine blends in behind a dracaena.
- Kitchen: Keep your scrap container under the sink—decorate it with trending 2025 colors like sage green or terracotta.
- Living Room: A peace lily nourished with compost brings nature indoors.
- Garden Corner: Use compost in a pallet planter with herbs. My parsley planter is now the star of my balcony!
DIY Tip: Paint your compost bin with earthy tones and add a “Compost Love” stencil—I did it, and it’s a balcony highlight!
7. Tips for a Healthy Compost
- Balance is Key: Too many greens = smells; too many browns = slow process. I keep a leaf bag nearby for quick fixes.
- Aerate Weekly: Stir to let the pile breathe. My Sunday ritual is oddly calming.
- Moisture Matters: Spray if dry, add browns if too wet. My spray bottle is my compost’s best buddy.
- Worm Wellness: If you use worms, ensure they have bedding and enough food. Mine love their cardboard beds!
My Mistake: I ignored my compost for a month—it turned into a swamp! Regular stirring saved the next batch.
8. My Composting Journey
When I first started, I thought composting was for people with big yards and lots of time. My first attempt was… well, a smelly disaster. But with practice, I got the hang of it. Now, my balcony compost bin feeds my basil, succulents, and peace lily—and I’ve cut my trash output in half. My home feels alive, my herbs perfume the air, and my plants are flourishing. With a mix of gardening and cozy home vibes, composting has helped turn my space into a sustainable little sanctuary.